 |
| My original Soda Club Edition 1 (left) and latest SodaStream Power (right) |
One of the first things you'll find after you buy a "carbonator" from Soda Stream or others is the CO2 refill bottles are very expensive, assuming you can find somewhere than sells them. Too expensive in fact. It's likely you can buy case of Pellegrino at Costco for less per litre than you'll pay for the 60L CO2 refill bottles. So, all you're getting with Soda Stream is the opportunity to drink local tap water, which likely is not as good Pellegrino, what with Clorine and Floride being added. At least it's easier to carry a single 60L CO2 bottle home than a case of Pellegrino.
Now CO2 being one of the most common gases on Earth, one would think it would be cheap and easy to obtain, and it is. Soda Stream more or less is charging you $40 for a bottle of compressed air. The only trick is getting CO2 into the bottle under pressure. At that price point most people figure it out fairly quickly, the 60L bottles don't last long, they are expensive, so the Soda Stream machine sits unused.

Now we see the problem, here's the solution:
1) Order a Sodastream Machine adapter
2) Find a local home brew supply shop
3) Buy a 5 pound CO2 cylinder at the home brew supply shop
4) Connect up the cylinder to the Sodastream Machine using the adapter.
 Done! You'll be returning to the home brew supply to get the cylinder refilled with CO2, it lasts 10 times longer than the 60L CO2 bottles and costs $10-$20 to fill (I'm paying $19 to refill my 5 pound CO2 bottle at the shop I go to).
Talking with folks, some really don't want a 5 pound bottle and hose on the counter, so refilling the 110L bottles is good for them. However I fixed up the cabinet to store the 5 pound bottles CO2 refill bottles and now connect via a hose directly to the SodaStream. All those took was drilling a hole in the bottom of the cabinet and door off and raising the hinges half inch, so the door could clear the top of the SodaStream machine.
 Let start with the process of refilling the 110L bottles yourself. This is the first method I used. To start, you'll need a dip tube 20 pound CO2 bottle ($150). These are very hard to find, brew shops don't carry them, you'll need to deal with a specialty gas company. It must be the "dip tube" style tank which draws gas from the bottom of the tank in order to have pressure enough to charge the 110L bottles. Next, you need to weight the bottles while filling them to have any idea if they are filling to not. One has to purchase the filling adapter ($100). Of course you want to have at least 6 empty 110L bottles handy. Connect it up and fill away.
 Simple as it sounds, it's really not "do it yourself" for the average person, it's a hobbyist thing. Dealing with 20 pound tanks under high pressure can be dangerous, one missed step and you disconnect a hose while a valve is still open and you have a high speed metal projectile jetting across the room. If you've ever dealt with refilling scuba tanks you know what I mean. If you have not refilled scuba tanks, this likely isn't the place to learn, as you're dealing here with CO2, one small leak in any connection when you open the valve on the 20 pound bottle and you get sprayed with -50c degree gas than can freeze the skin right off your hands, or face. That said, I never had a problem refilling tanks for 5 years. Wear gloves.
One gotcha is the "tink" sound. SodaStream has an anti-refill valve in the nozzle, that sort of works, 5 out of my 7 bottles fill without problem, but two of them I have to fill very slowly or I hear a metallic "tink" sound and they stop filling. Then I have to depressurize the line and try filling again. The right thing to do it replace the nozzle on these problematic bottles.


(Above left) 5 pound bottle with the more expensive pressure gage, which is really not needed, you can easily when you're charging the bottles that pressure is getting low. Also avoid the "quick release" connector, mine broke and it's really not needed. (Above right) the 110L bottle inside the Edition One machine.
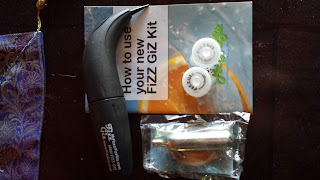
The "Fizz Giz" (above) let you use tiny CO2 cylinders with a bottle cap to fizz up some water. It doesn't really work well, maybe I'll buy a few more cylinders and try again but thus far it is not putting much carbonation into the water. People are using paint ball CO2 cylinders with SodaStreams. Sounds like a good idea, never tried it.
Lastly, there's a few sites selling kits to produce CO2 at home, I've not tried any of them.
 |
| The CO2 bottle refill adapter (above) and connected to 110L bottle and 20 pound CO2 tank (above right) |


The "Fizz Giz" (above) let you use tiny CO2 cylinders with a bottle cap to fizz up some water. It doesn't really work well, maybe I'll buy a few more cylinders and try again but thus far it is not putting much carbonation into the water. People are using paint ball CO2 cylinders with SodaStreams. Sounds like a good idea, never tried it.
Lastly, there's a few sites selling kits to produce CO2 at home, I've not tried any of them.
SodaStream flavor syrups - Make your own soda!
These syrups you mix with the carbonated water to make your own soda at home. My son's favorite is the root beer. They are rather expense, though you can buy any type or brand of soda syrup. Personally, after trying a lot of mixes, I found the best to be Kool-Aid Lemonade Flavored Unsweetened Drink Mix. Add your own sugar. The they mixes with sugar pre-added then to be awful. The Kool-Aid Unsweetened 96 pack is around $20 and makes 200-400 glasses depending on how much you use, so it's a fraction of the price of SodaStream syrup and teases better.


